Along with the quality of light that you choose or create, the direction from which the light hits the subject is another fundamental factor. From gross variations to more subtle you can move either the light or the subject to bring out the quality you want. With a craggy old man you may wish to bring out the wrinkles, so sidelight will work best. For a woman for whom you want to hide any wrinkles, the light wants to be from the front, where the wrinkles are least obvious.
Bottom Line: The direction that the light comes from has a major bearing on how the subject looks.
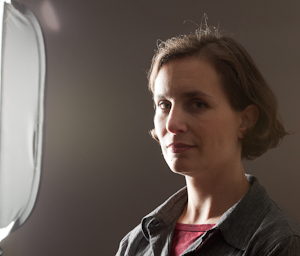
100mm, f9.5, Speedlite in 24" softbox, ISO 800
Left
Right
I happen to love silhouettes, although they clearly have limited uses. But on many occasions, I found that placing a subject in front of a window and letting backlight be the main source worked really well — but only if there is some light bouncing back into the face.
This extreme side-back look is dramatic, and it's not hard to use a reflector to bring some light back to the dark side, though I didn't do that in this case.
Bringing the light around from behind more towards the left produces a dramatic look, and with some fill or bounce on the dark side this is a good solution - for some people and objects: notice how you can see the texture of Nicole's skin. (And notice I didn't use the word "wrinkles".) If you want to bring out texture, light from the side.
Here the light is about 3/4 of the way between sidelight and front light; see how the skin texture is less obvious, though the shape of the features is still quite strong.
Here the light is directly over the camera — front lighting, which reveals the least skin texture and shape.
But if you play with much larger, closer light sources than a 24" softbox, you can get some very lovely results with front lighting.
Now the light is directly to the right of Nicole, but since she is turned to the left, the light is pretty dramatic across her features. But I tend to think that having the main light come from the hidden side of the face, with fill on the dark side (panel 3) usually works better than this.
With the light almost behind Nicole on the right, the light is looking almost like a snapshot near a window because it doesn't feature any aspect of her face very well, so it looks accidental — and that might be what you want.
Now the light is almost behind, but on the right, and I have post-processed the image to allow detail on the dark side and allowed the hair to go way into gonzo overexposure.